Introduction to workflow creation
A workflow in Cargo is a sequence of connected actions (called nodes) that process and move data in a specific order. Think of it like an assembly line where each station (node) performs a specific task.
This introduction covers all required steps to create and publish a workflow.
Start with a draft
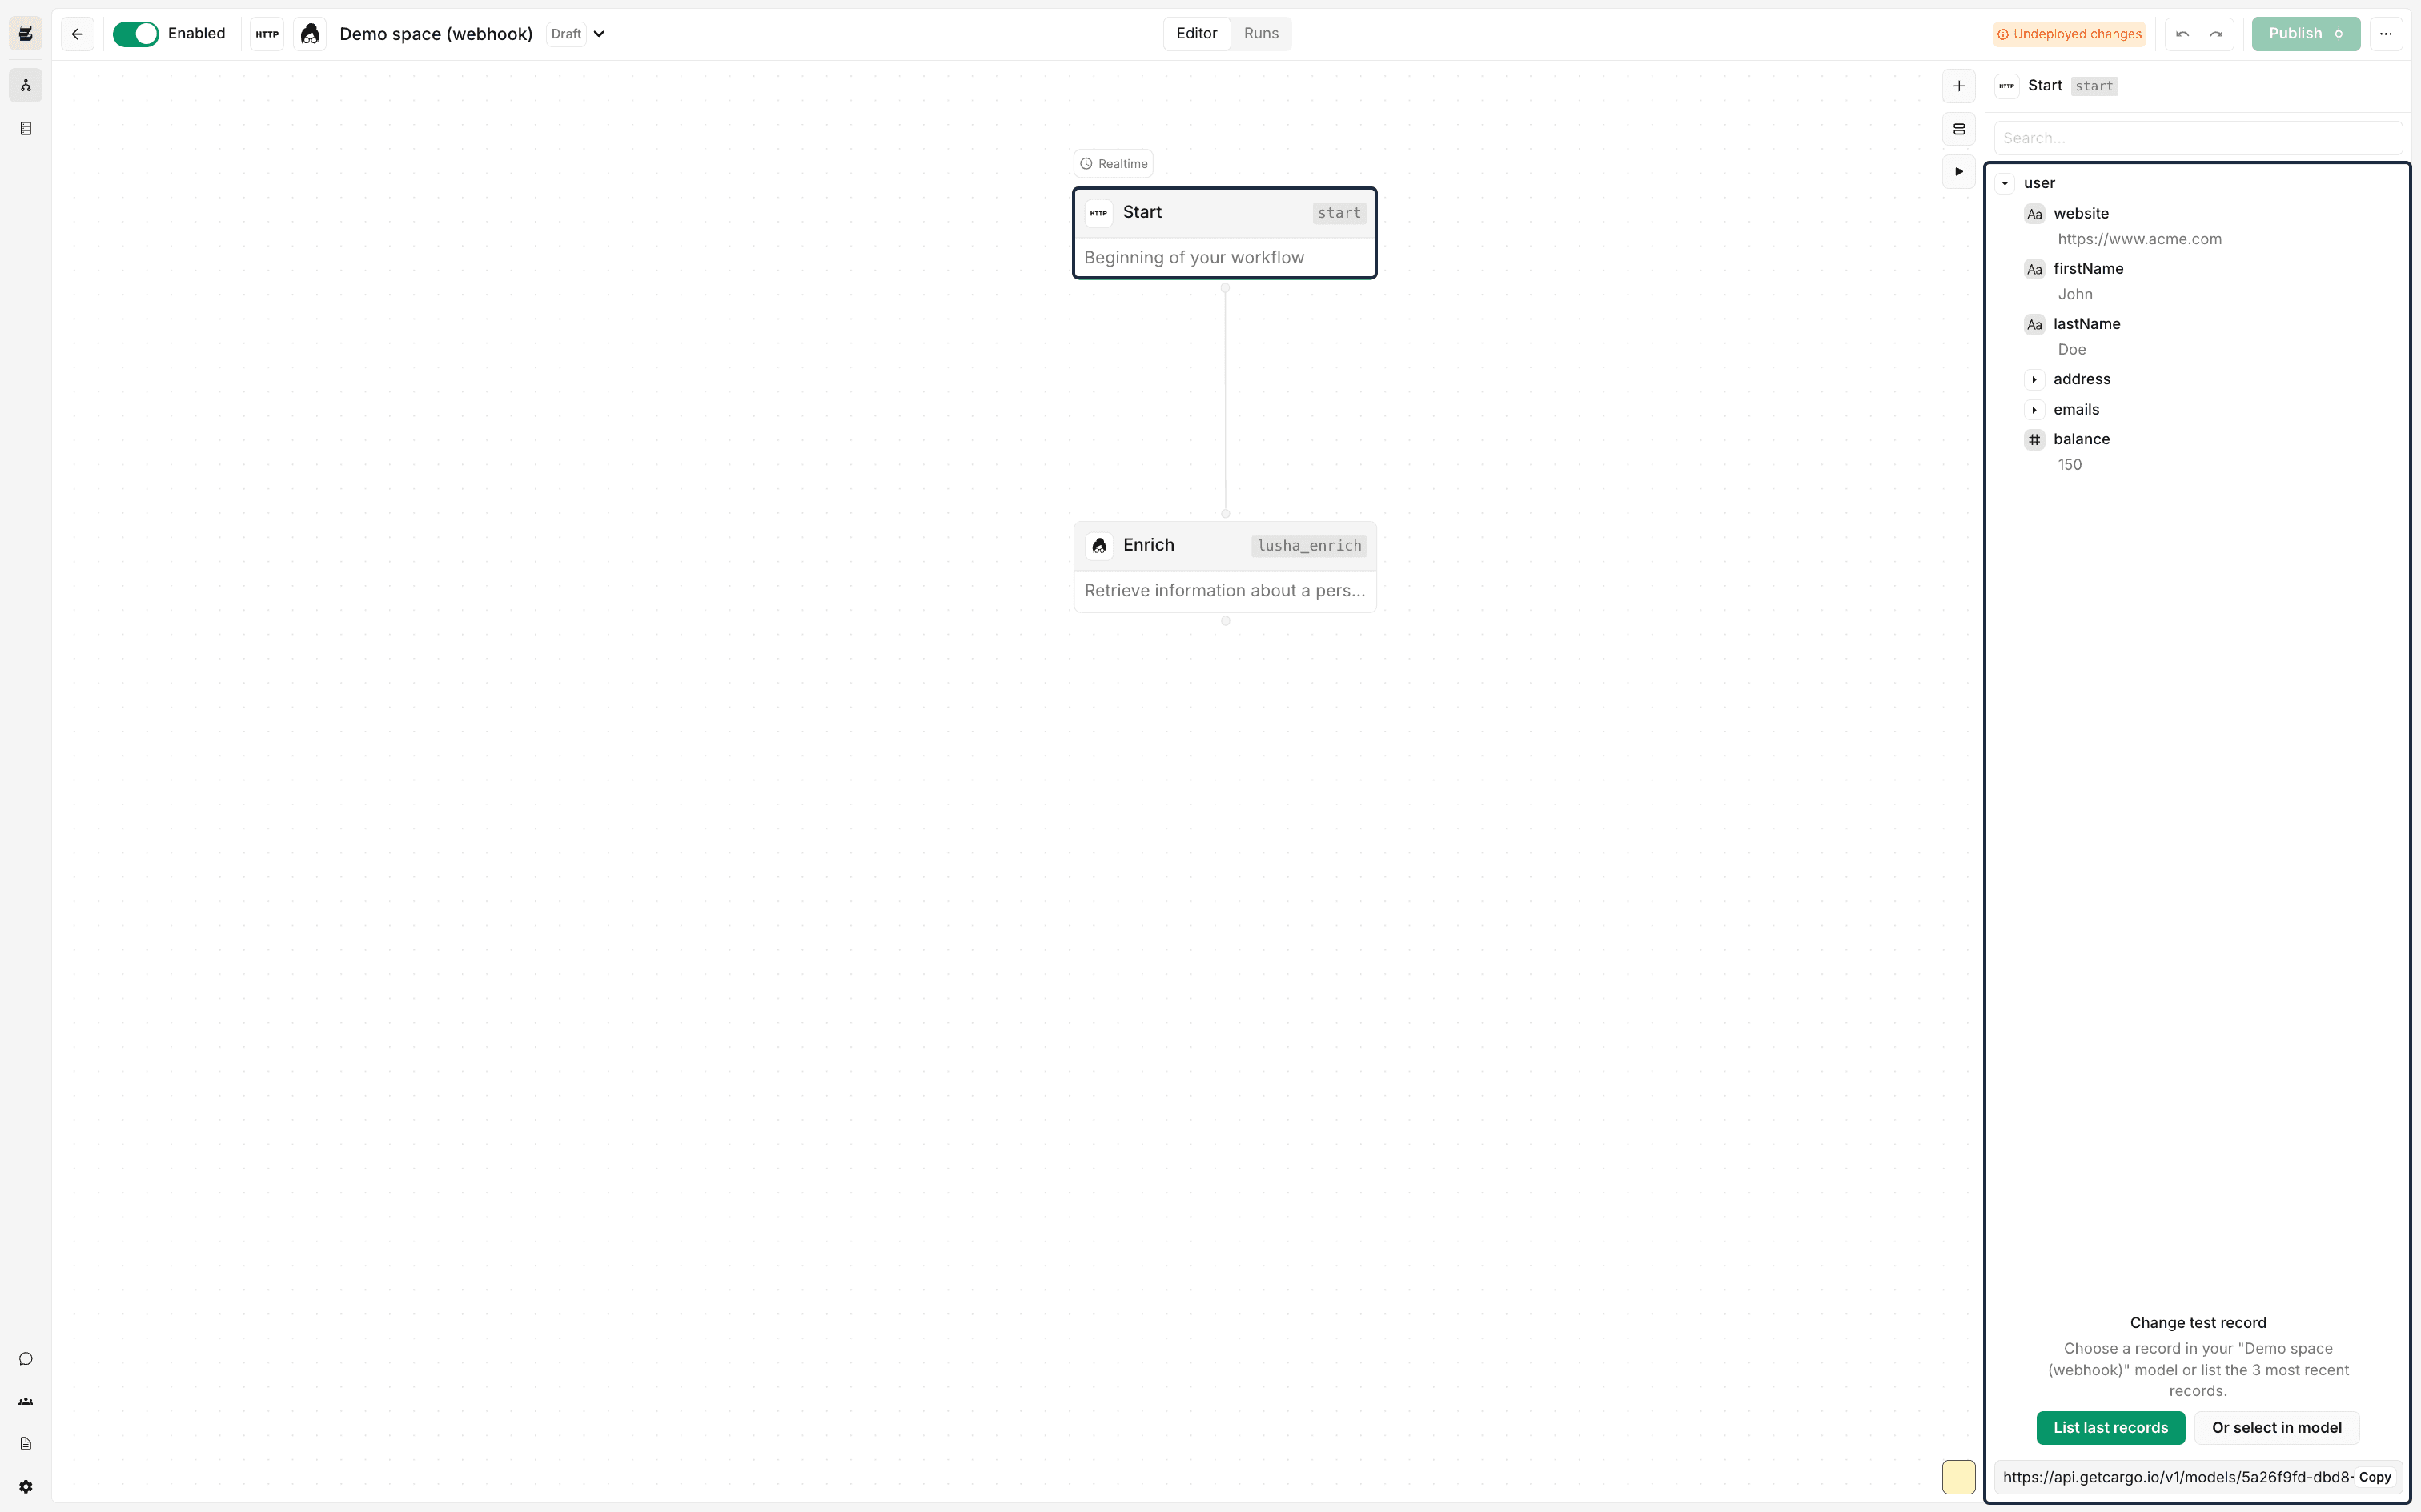
Workflows are build in Cargo's powerful editor that is a free-form canvas where you can drop nodes to create any type of workflow logic.
Every workflow begins with choosing a right data model that the new workflow should operate on. This will decide:
- what initial data will be available in the workflow
- how the workflow can be triggered
Once workflow is created, a draft version is stored and all changes made in the editor are auto-saved.
To get around workflow canvas more easily, check Editor Reference to learn about all features.
Add and connect nodes
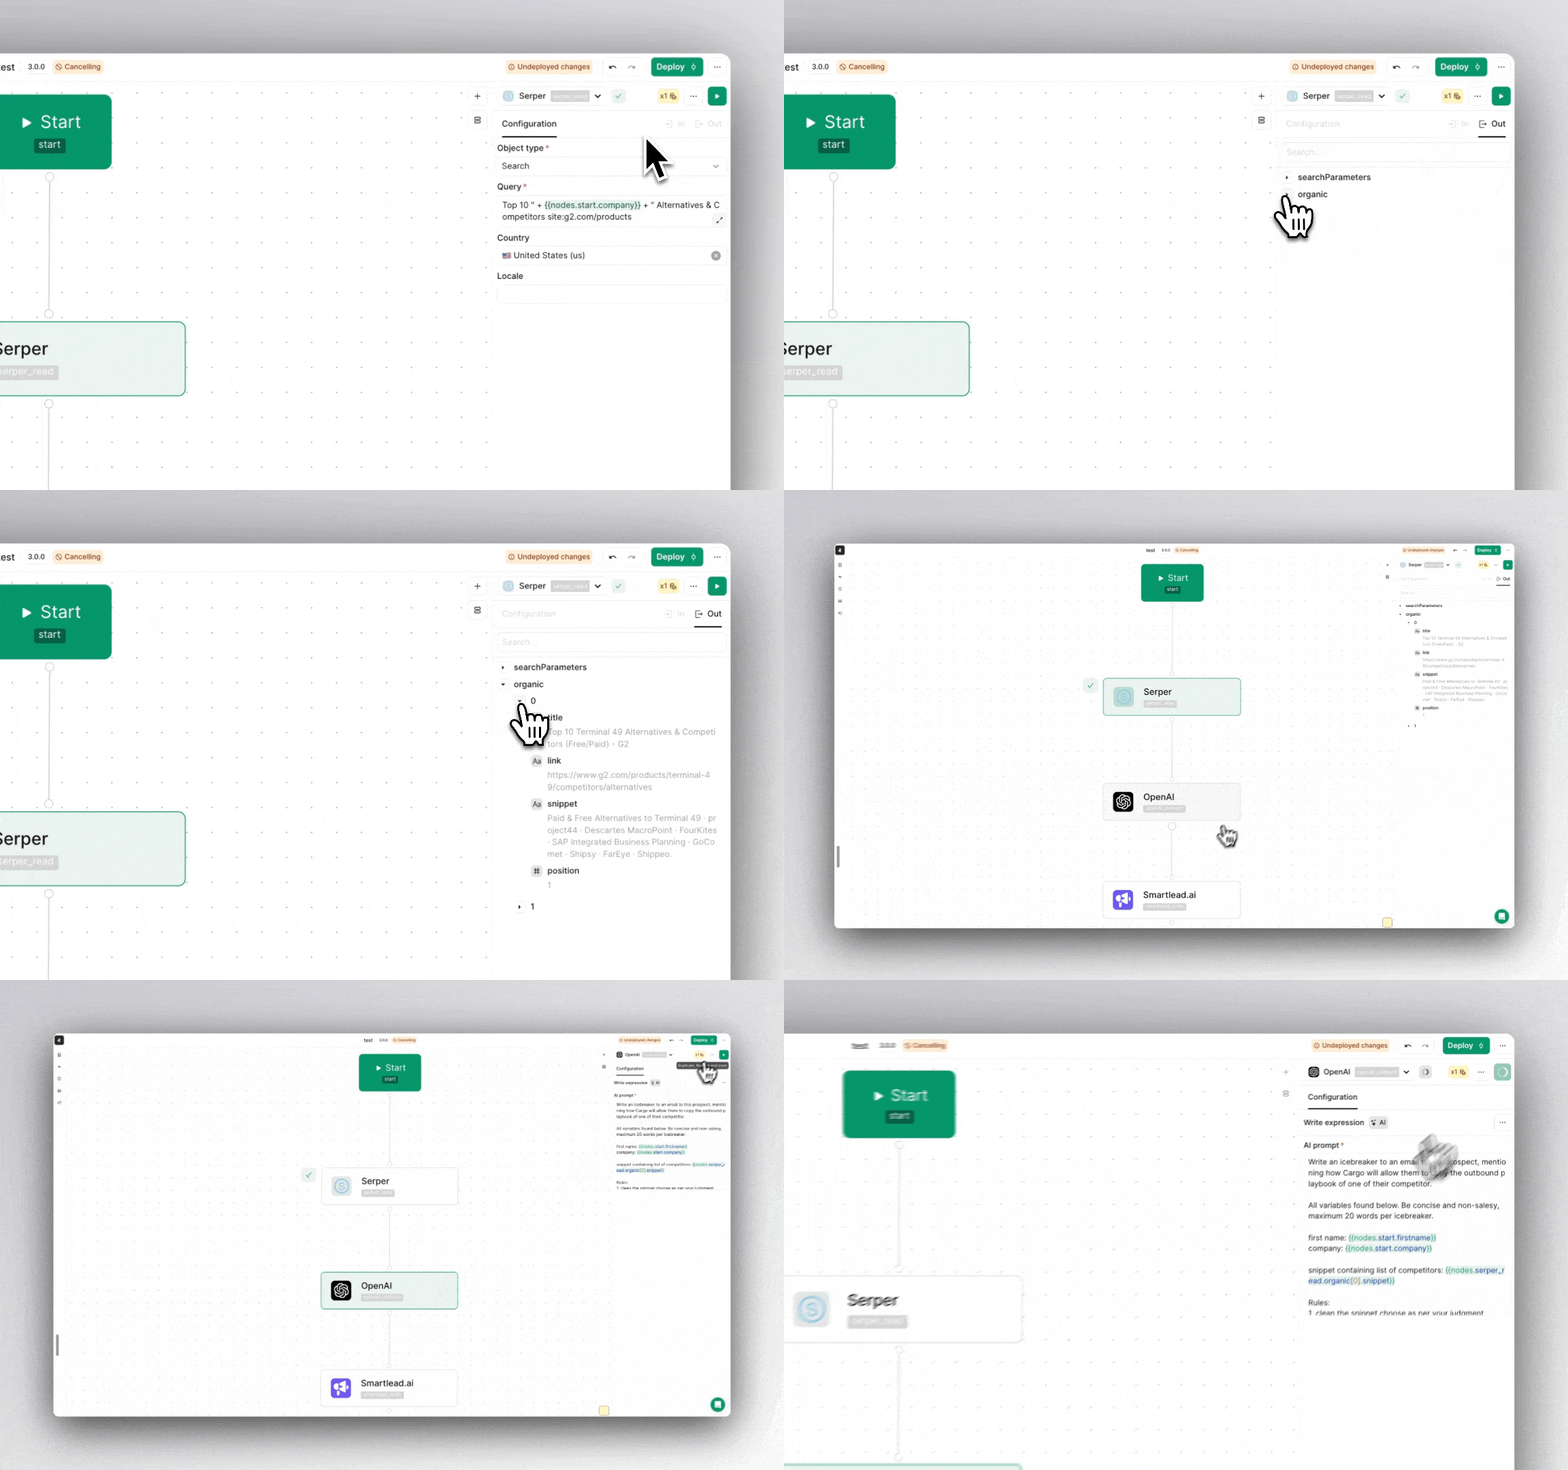
Each workflow comes with one special node called start node that is a single starting point for each workflow.
From this point you can drag and drop nodes from the nodes catalog. Once a node is added it needs to be linked to existing nodes to become a part of the workflow.
Each node needs to be configured individually as it carries dedicated settings related to specific task it performs. For instance a logic node can contain routing settings to control complex flows, while a 3rd party integration node allows to specify a payload or settings of an external API to call.
For a complete reference of available nodes, see our Nodes Reference documentation.
Test the workflow continuously
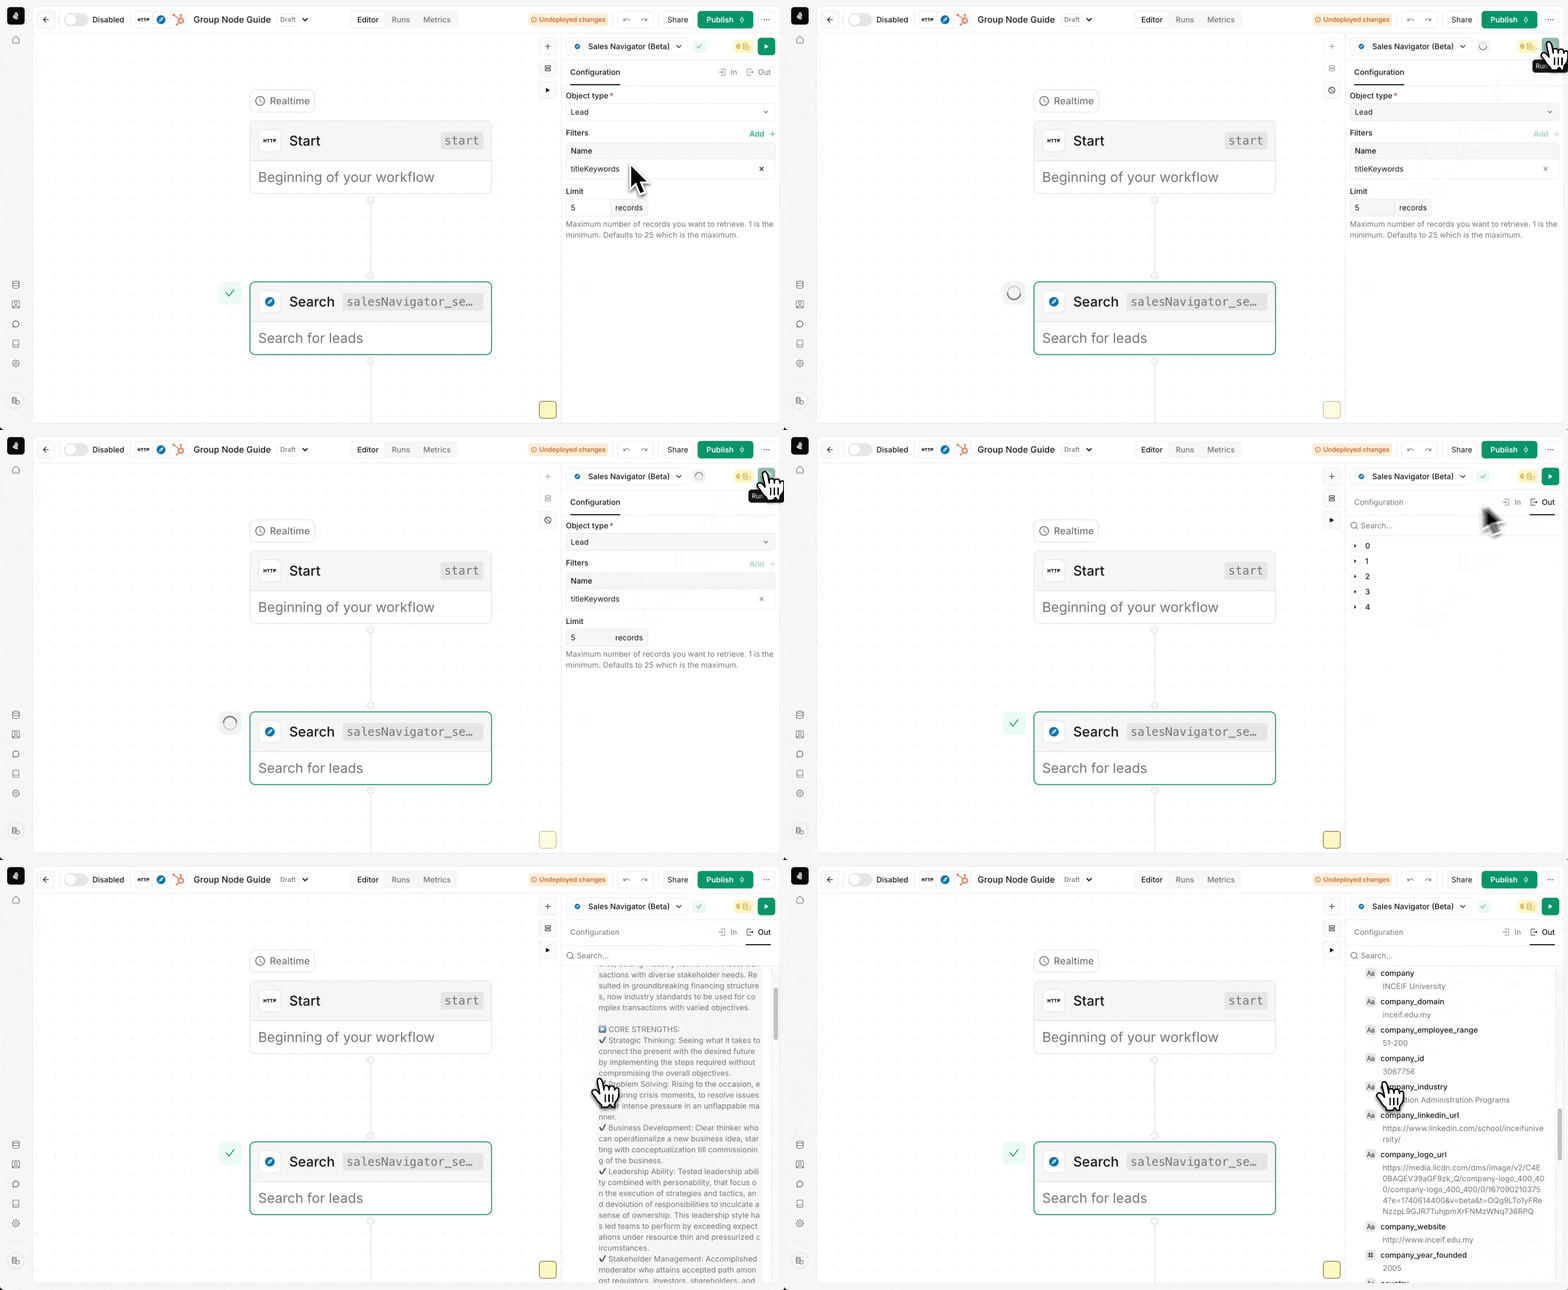
As you add and configure each new node in your workflow, you can run it to ensure it yield correct results. Runnig nodes allows to not only verify if the configuration is correct, but also preview the results of each node.
Once a node is run it's results will be available to use in any consecutive node.
Learn more about testing in our Error Handling guide.
Publish and enable
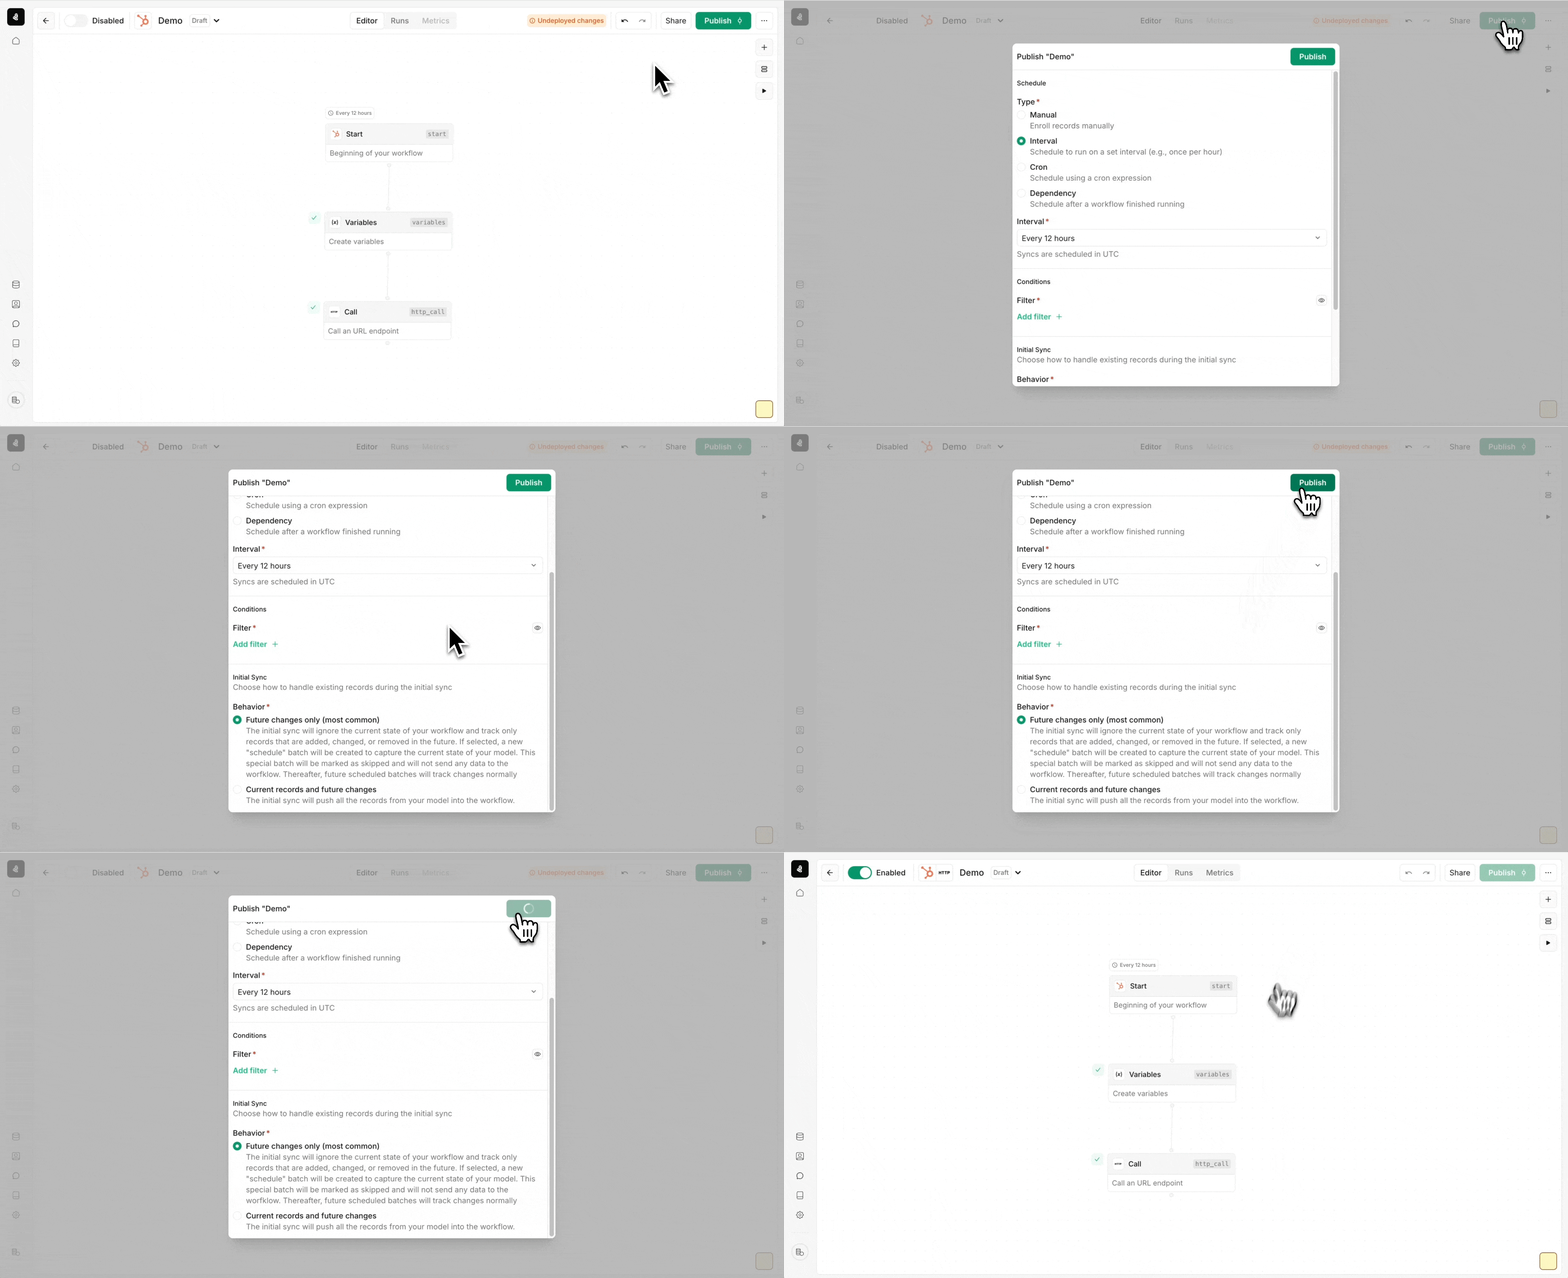
Once you are happy with your workflow design, you can publish it. It will create a new version of the workflow which will be used by all future runs.
When you press the "publish" button, by default the workflow is enabled. Untoggling the "enabled" button can disable the workflow. Once disabled, the workflow won't automatically enrol any data, but it can still be manually enrol runs through a disabled workflow.
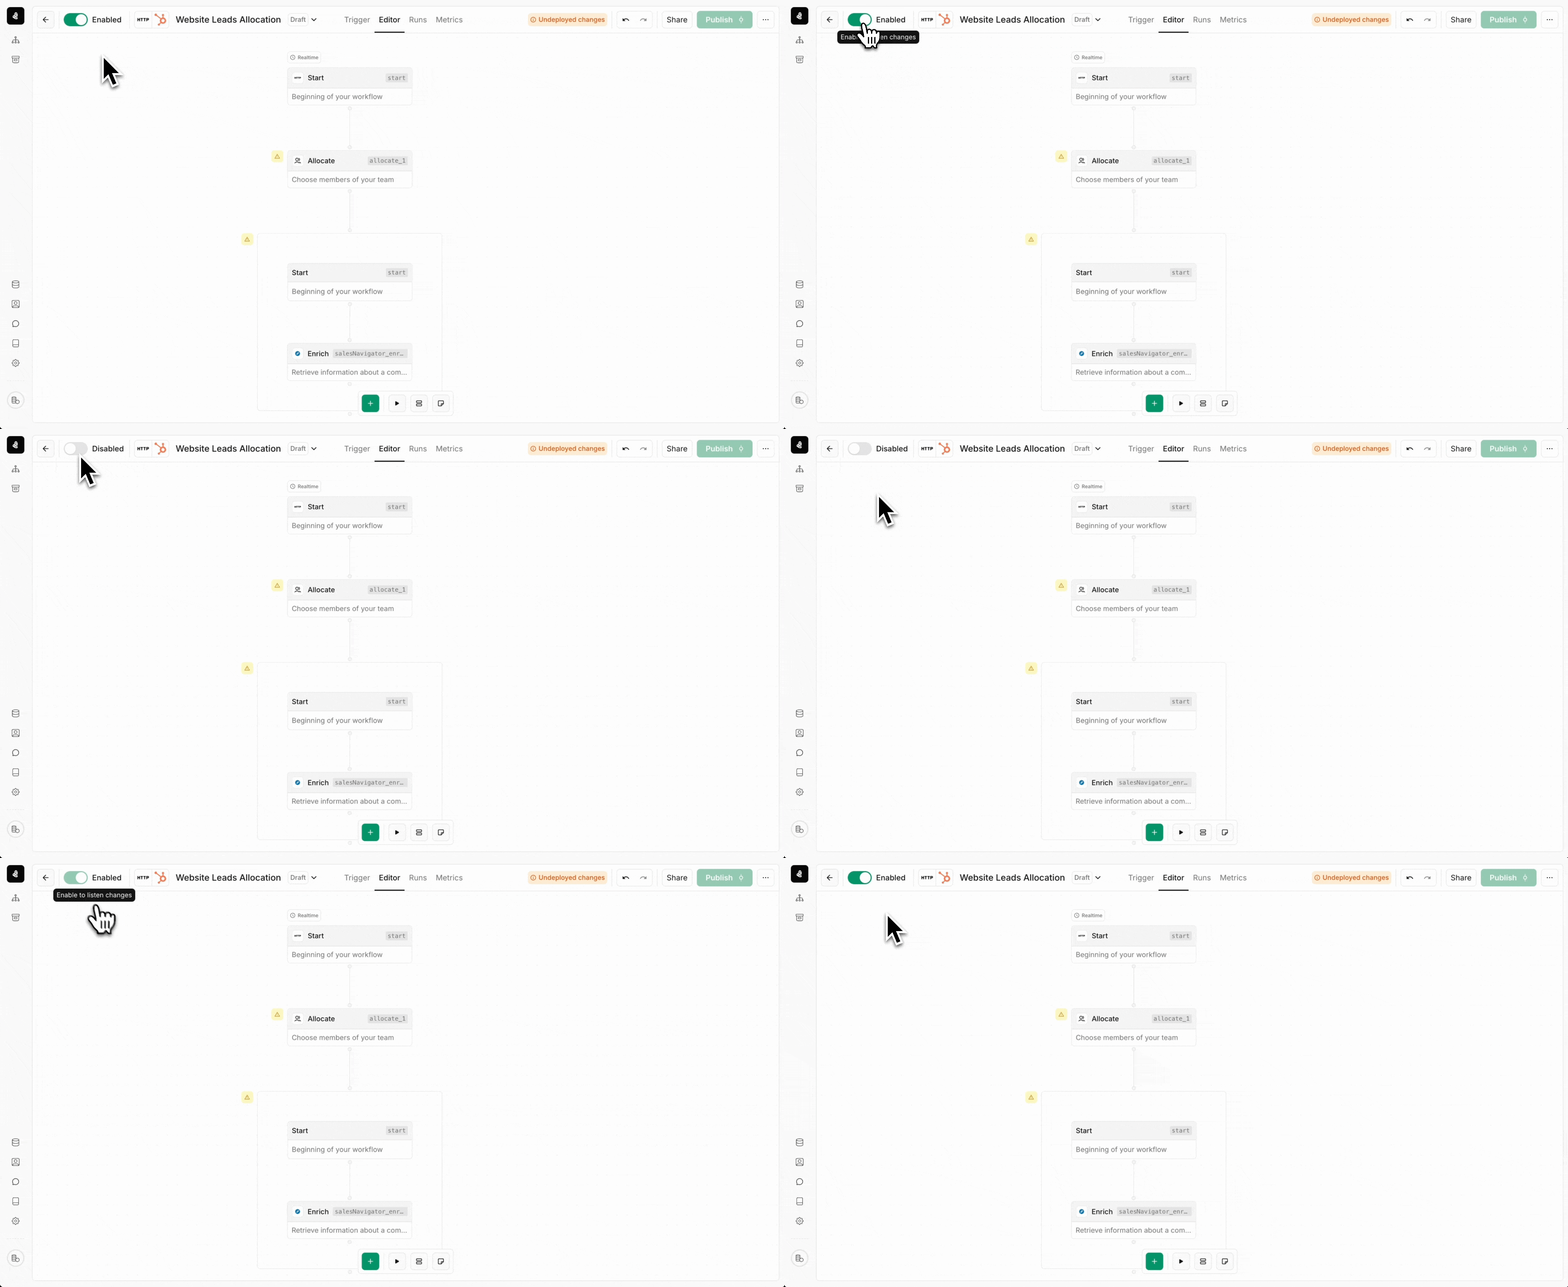
See Understanding Workflow Triggers for detailed triggering options.
Customize sync settings
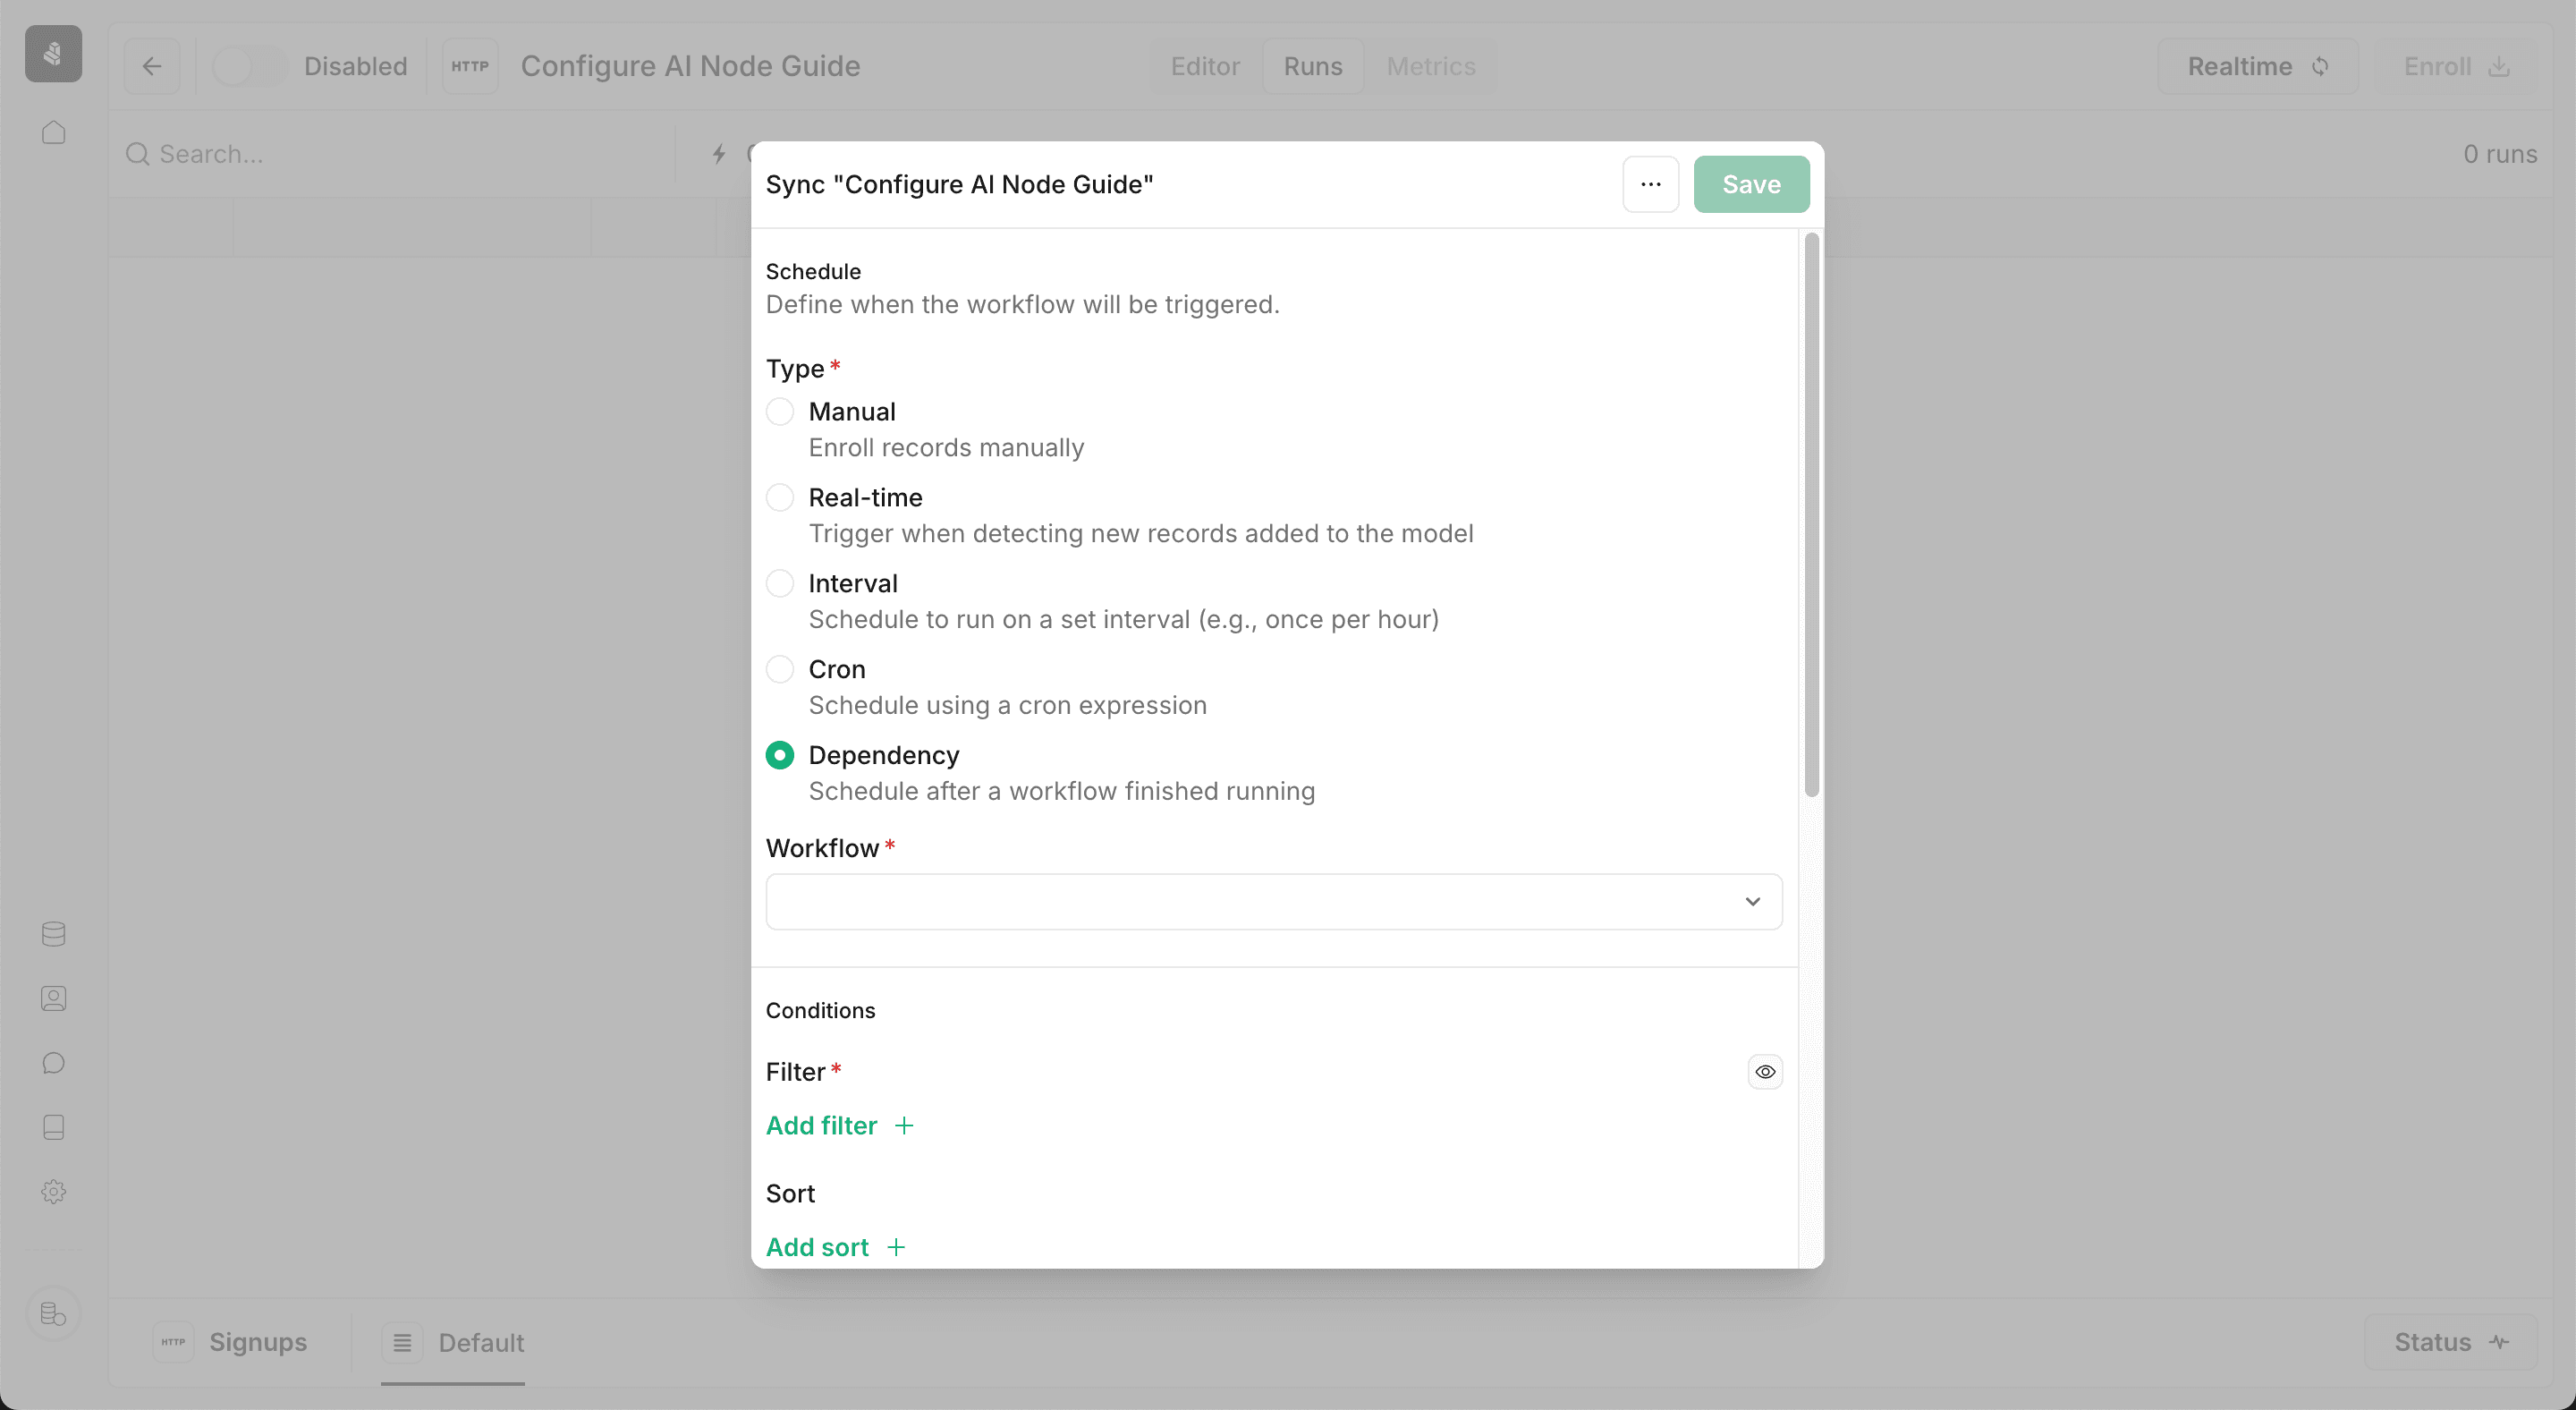
As indicated above each workflow will start processing records based on default settings. They can be viewed and edited in the sync settings and allow to highly refine the enrolment logic of the workflow.
For instance the workflow may process in real-time in case of HTTP webhooks, or run only on predefined weekly schedule (twice a day, only on working days).
Check Editor Reference to learn about all Sync features.
What's next?
Continue to workflow operations to learn more how to operate and maintain a workflow once created and published.